What Print Size Should a Front, Back or Sleeve Logo Be?
Use practical centimetre starting sizes for chest, front, back and sleeve logos, then approve the final dimensions on the actual shirt.
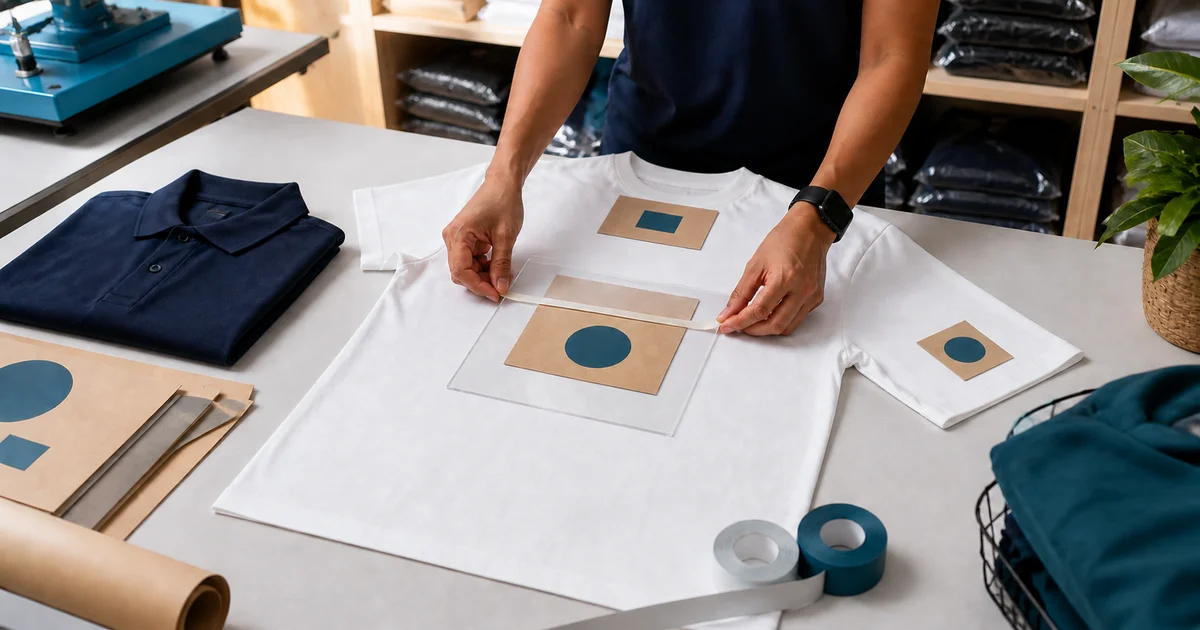
The short answer: for standard adult company shirts, start around 7.5–10 cm wide for left chest, 15–25 cm for a compact centre-chest logo, 25–30 cm for full front or full back, and 5–8 cm for a short-sleeve mark. These are planning ranges—not universal maximums. The final size must follow the artwork shape, garment, method and printer’s template.
Always specify the finished width in centimetres. “Small”, “A4”, “pocket size” and “standard” can mean different things to different suppliers.
Practical adult starting sizes
| Logo or artwork position | Starting width | Use it for | Confirm before approval |
|---|---|---|---|
| Left chest | 7.5–10 cm | Company logo, badge or initials | Pocket, placket, embroidery frame and small text |
| Centre chest | 15–25 cm | Compact front logo or short line of text | Distance from collar and artwork height |
| Full front | 25–30 cm | Large promotional graphic or bold brand mark | Smallest shirt width and ink coverage |
| Upper back | 20–30 cm | Department name or horizontal wordmark | Hair, collar and viewing distance |
| Full back | 25–30 cm | Crew identity, large logo or event graphic | Garment panel, print method and top position |
| Short sleeve | 5–8 cm | Simple secondary mark | Sleeve width, seam clearance and arm wrap |
Use the width as the controlling measurement and let the height scale proportionally. A 10 cm-wide horizontal wordmark is much shorter than a 10 cm circle, so equal widths do not create equal visual weight.
Where do these ranges come from?
First-party decorator guides publish similar areas but also show why no single “correct” size exists:
- Transfer Express lists a 4.5-inch standard left-chest area, an 11-inch standard adult design and separate youth sizes.
- STAHLS’ publishes up to 12 × 14 inches for full-front and full-back designs and a 5 × 5-inch left-chest imprint area.
- Printify’s 2026 guide gives broad ranges for left chest, centre chest, front, back and sleeve, while warning that size and supplier change the available area.
- SanMar’s garment-specific sheet states directly that decoration area depends on garment size, method and equipment.
The centimetre figures in this article are conservative buyer starting points within those published areas. They are not Baju Printz production specifications. Your selected Malaysian printer’s actual template is the final technical limit.
Measure the artwork, not the page around it
The finished print size is the visible artwork’s bounding box. Empty transparent space around a PNG should not count as the logo width.
Give the printer:
- exact visible width in centimetres;
- proportional height;
- location such as wearer’s left chest or upper back;
- top or centre reference from collar, placket or seam; and
- the garment model and size used for the proof.
If the artwork contains several separated elements, decide whether the measurement covers the whole composition or only the main logo. Mark it on the proof.
Do all garment sizes need one print size?
Using one artwork size across every garment is efficient, but it may not look balanced. A full-front design approved on size L can crowd a small shirt and appear modest on a much larger shirt.
Ask the printer whether the order should use groups such as:
- children’s sizes;
- adult XS–S;
- adult M–XL; and
- adult 2XL and above.
These are discussion groups, not fixed industry rules. The actual split depends on the garment width and supplier workflow. Some print systems scale designs automatically; a local bulk printer may instead use one screen or transfer size unless separate setups are requested.
Check the Malaysia bulk shirt size guide when your order mixes cuts or size systems.
Why can a 10 cm logo still fail?
The logo has tiny text
Increasing the overall width may not make a thin tagline suitable for printing or embroidery. Ask the printer to test the smallest letters and lines at final size. A simplified small-format logo is often safer than forcing every brand element into the chest mark.
The artwork is the wrong resolution
A raster file can look sharp when small but blur after enlargement. Follow the t-shirt artwork guide and provide a vector logo where possible or a high-resolution image at the final dimensions.
The print area is interrupted
Pockets, plackets, seams, sleeve hems and fabric folds reduce usable space. The machine may also need a flat area larger than the visible logo.
The shape has different visual weight
A tall narrow mark, round badge and long wordmark should not all be assigned the same width automatically. Review actual-size templates together.
The method has its own limit
Embroidery frames, screen sizes, transfer sheets and heat-press platens do not share one maximum. Printful’s current embroidery placement guide uses a 4 × 4-inch maximum area for left-chest embroidery on its products, for example; another supplier or garment may differ.
Test the size with a paper template
Before paying for a sample:
- draw a box at the proposed final width and proportional height;
- print or cut it at 100% scale;
- place it on the actual garment model;
- check it flat and on a person;
- photograph front, side and back views; and
- repeat on the smallest and largest garment in the order.
This catches an oversized chest badge, a sleeve mark that wraps away from view and a full-front print that is too wide for smaller shirts.
Approve an annotated proof
The final proof should show:
- visible artwork width and height in centimetres;
- garment model, colour and sample size;
- wearer’s left or right side;
- reference distance from collar, placket or seam;
- any separate size groups;
- print or embroidery method; and
- front, back and sleeve views where applicable.
Use the company logo placement guide to decide which locations the uniform actually needs. Then request quotations through Baju Printz with the same dimensions and proof so suppliers price an equivalent specification.
Frequently asked questions
What is a practical width for a left-chest logo?
For a standard adult shirt, 7.5–10 cm wide is a useful starting range for many left-chest logos. The final size must fit the supplier's decoration area and keep small text or details legible.
How wide should a full-front or full-back t-shirt print be?
About 25–30 cm wide is a common adult starting range for a full-front or full-back design. Garment size, artwork proportions, print method and the printer's maximum area may require a smaller or separately scaled version.
Should every shirt size use the same logo size?
Not always. One size may work across a limited adult range, but children's, very small and larger garments can need separate artwork-size groups to preserve margins and visual balance.
How can I check a logo size before printing?
Print or cut a paper template at the exact finished dimensions, position it on the actual garment and review it both flat and worn. Then approve an annotated digital proof or physical sample in writing.
Ready to compare suitable printers?
Get 5 Free Quotes