
How to Print a QR Code on a T-Shirt So It Scans
Plan a scannable QR code T-shirt with the right quiet zone, contrast, print size, placement and physical testing before full production.
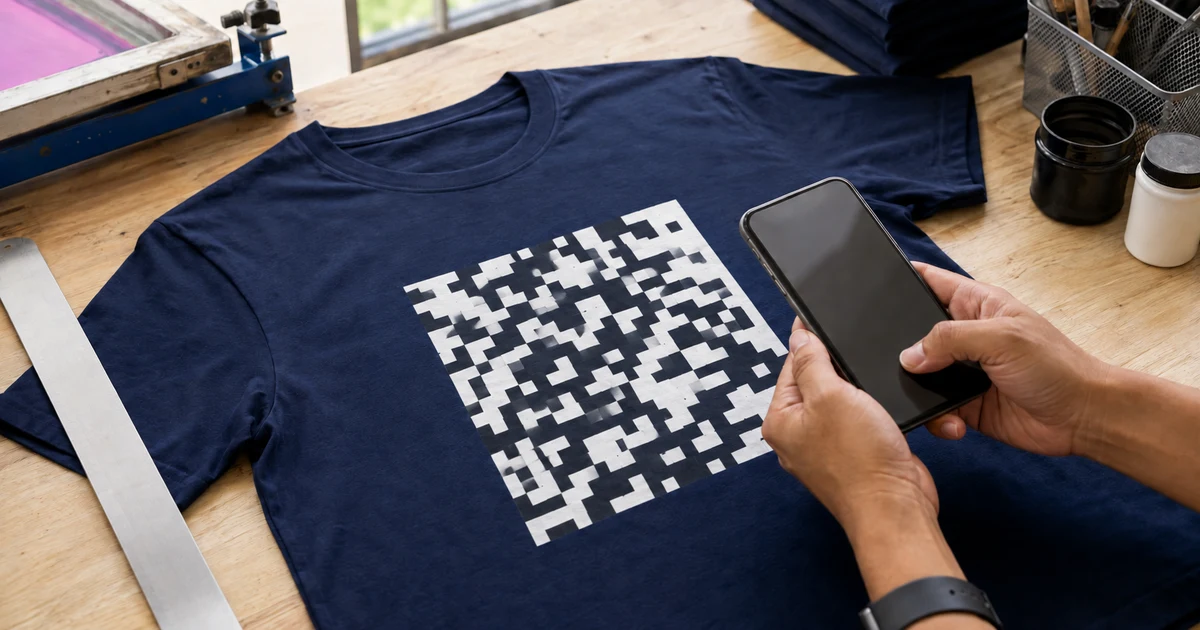
The short answer: print the QR code as a functional code first and a decoration second. Keep its square grid intact, preserve a clear border, use strong contrast, place it on a flat area and scan a physical sample before approving the full T-shirt order. No printer can promise that every phone will scan every garment from every angle.
The important approval is not a clean file on a monitor. It is the finished code on the chosen fabric, at the agreed size and position, working from the distance your audience will actually use.
Decide the destination before generating the code
Start with the final HTTPS page you want visitors to open. Test that page on mobile, confirm it belongs to a domain your organisation controls and decide who will keep it available after the event or campaign.
If the destination might change, use a redirect on a domain you control and keep the printed code pointing to that stable address. Avoid printing a temporary preview link, a file that needs private access or an unverified third-party short link. A shorter destination can also produce a less dense symbol because QR Code capacity varies with the amount and type of data encoded, as explained in DENSO WAVE’s QR Code versions guide.
Before sending artwork, scan the digital code and check the exact destination. The final artwork file, proof and physical sample must all use the same version.
Protect the parts that make the code readable
A QR code is not a general black-and-white texture. Its layout includes finder patterns, timing information, data modules and an empty border called the quiet zone.
DENSO WAVE’s official QR Code guidance specifies a quiet zone four modules wide on every side. A module is one small square in the grid, so the required border grows with the printed module size. Do not measure the white border only by eye or crop it tightly to save space.
Use this artwork rule:
| Preserve | Avoid | Why it matters |
|---|---|---|
| Four-module quiet zone | Text, borders or graphics touching the code | The scanner needs separation from surrounding artwork |
| Even square modules | Stretched, rounded or uneven cells | Distortion changes the grid the phone must interpret |
| Complete finder patterns | Cropped corners or decoration over the large squares | These patterns help the camera locate the symbol |
| Strong light-dark contrast | Gradients, camouflage or a busy fabric behind the code | Low contrast makes modules harder to distinguish |
| One approved final file | Rebuilding the code inside the printer’s software | Regeneration can change the symbol or destination |
The GS1 2D barcode design guidance likewise recommends a high-contrast, even square grid and warns that shortening, cutting or adding images can affect performance. GS1’s retail specification is not a universal T-shirt sizing rule, but these symbol-quality principles are useful when reviewing shirt artwork.
Do not rely on error correction to rescue a styled code
QR Codes include error correction that can restore data when part of a symbol is dirty or damaged. DENSO WAVE explains that higher correction levels improve restoration but can increase the symbol size.
That feature is a safety margin, not permission to place a logo, photograph or slogan over the centre. Covering modules consumes some of the margin before the shirt is stretched, folded, faded or poorly lit.
For the most dependable result, keep the generated code unchanged. If an internal logo is essential, tell the printer and test the exact exported artwork. Do not approve a plain code and replace it with a branded version after the sample.
Choose size from the modules and viewing distance
There is no honest universal answer such as “every shirt QR code should be 8 cm”. The correct size depends on:
- how many modules the generated symbol contains;
- the physical size of each printed module;
- how far away the audience will hold the phone;
- the sharpness the print method can reproduce on that fabric;
- whether the garment will curve, fold or stretch at the chosen position.
Ask the printer to mark the total finished width and height on the proof. Then inspect an individual printed module, not only the outside dimensions. A large but heavily distorted code is not automatically better than a smaller crisp one.
Test from the intended distance. A code for staff standing beside an exhibition visitor has a different use case from one expected to scan across a hall. If the distance or garment movement makes scanning awkward, put the same destination on a fixed sign or handout as a backup.
Place the code on a stable, uncluttered area
Choose the flattest practical print area and keep the whole quiet zone away from seams, pockets, zips, ribbing and strong folds. The upper or centre back may be more stable than a small chest area for a larger code, but the right position depends on the garment cut and how it will be worn.
On a dark shirt, the printer may need a light printed field beneath and around the code so its background remains consistent. The field must include the quiet zone; simply printing dark modules directly on a dark or patterned fabric does not create useful contrast. Our guide to printing on black T-shirts explains why dark garments need an appropriate foundation.
For a pocket, side seam or zip placement, review the extra limits in the guide to printing over pockets, seams and zips. Moving the code a few centimetres to a flatter area is usually a better trade than making a damaged grid look fashionable.
Match the artwork to the print process
Give the printer the original QR output as a vector file or high-resolution one-colour image. Do not send a messaging-app screenshot. The file should contain only the final symbol and its protected background, with its finished dimensions stated.
Different processes reproduce fine edges and fabric movement differently. Ask the printer which process can hold the smallest module cleanly on your selected shirt, rather than choosing from method names alone. Use the silk screen, DTF and DTG comparison to frame that discussion, then let the physical sample decide.
If one campaign uses several shirt materials or colours, approve each combination that changes the printed result. A code that works on a smooth light cotton sample is not evidence that it will behave identically on a dark stretch sports jersey.
Scan the physical sample like a customer
Use the exact production artwork, shirt and print method for the sample. Before bulk production, test it:
- Flat on the table and while the shirt is worn
- With more than one common phone camera
- Straight on and at realistic angles
- At the intended scanning distance
- In indoor light and the likely event light
- After the agreed wash test if the shirts will be reused
Confirm that every successful scan opens the correct page, not merely that a camera recognises a code. Record the artwork version, finished dimensions, position, garment, printing method and sample result in the physical sample approval checklist.
A passed sample reduces uncertainty; it does not guarantee every camera, network connection or damaged shirt. Keep a readable short web address near the booth, event material or another fixed surface as a fallback.
Send a quote-ready QR shirt brief
Include the final destination, QR artwork file, garment product and colour, required quantity and sizes, print position, intended viewing distance, event deadline and sample-testing requirement. Ask the printer to state the final print dimensions and any change it recommends before production.
You can request quotations through Baju Printz with those details. Ask for a physical sample scan test before releasing the full order.
Frequently asked questions
Can a QR code be printed on a T-shirt?
Yes. A QR code can work on a T-shirt when its square modules, finder patterns, quiet zone and contrast remain clear at the finished print size. Approve a physical sample and scan the actual garment before full production.
What size should a QR code be on a T-shirt?
There is no universal centimetre size for every design. The required size depends on the code's module count, intended scanning distance, print method, fabric and placement. Ask the printer to state the finished dimensions, then test a physical sample from the distance people will use.
Can I place a logo in the middle of the QR code?
It is safer to keep the code unmodified. A logo covers modules and uses part of the code's error-correction margin. If branding inside the code is essential, regenerate and test the exact final artwork rather than assuming error correction will make it reliable.
Which colours are best for a printed QR code?
Dark modules on a plain light background are the safest starting point, with black and white giving strong contrast. Avoid busy fabric patterns, gradients and reflective effects around the code, and test the real print under the lighting where it will be scanned.
Will a printed QR code still scan after washing?
Not automatically. Distortion, cracking, peeling or fading can change the module pattern. Follow the approved care instructions and, when repeat use matters, include a representative wash test in the sample approval.
Ready to compare suitable printers?
Get 5 Free Quotes