
Custom T-Shirt Neck Labels: Printed, Heat Transfer or Woven?
Compare printed, heat-transfer and woven neck labels for custom T-shirts by comfort, durability, detail, garment compatibility and reorder needs.
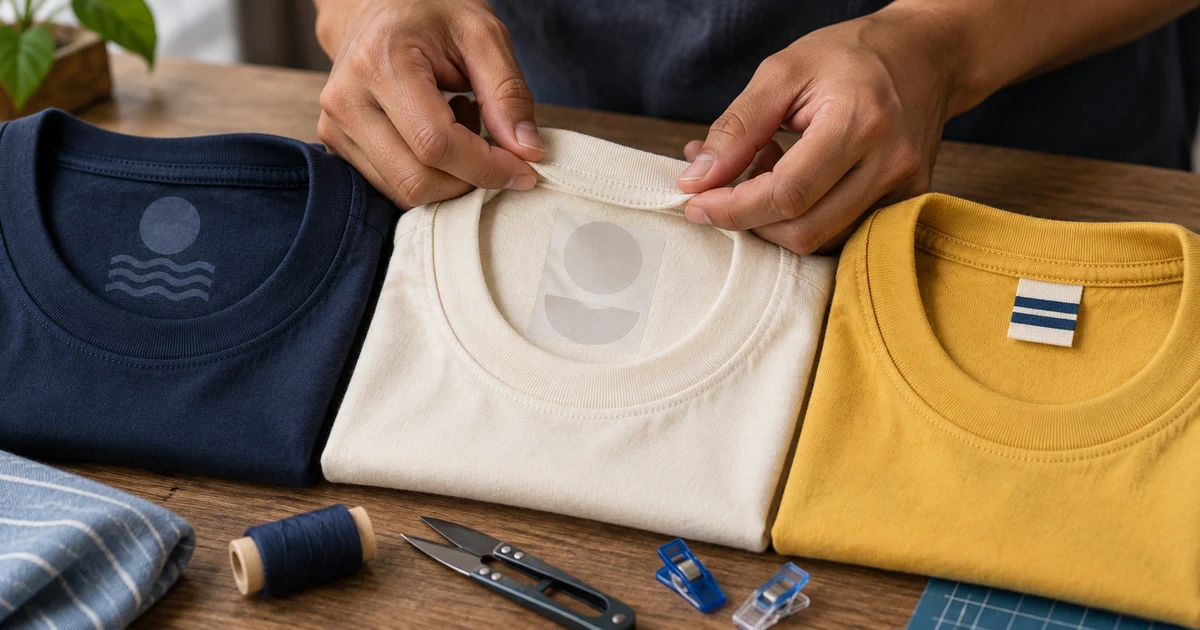
The short answer: choose a printed or heat-transfer neck label when you want a low-profile finish and the actual shirt passes application and wash tests. Choose a woven or satin sewn label when a separate physical brand trim matters and the added seam or edge remains comfortable. There is no universal winner: the blank garment, label content, order quantity, comfort target and reorder plan decide the right method.
Do not approve a label from a mock-up alone. The back neck is exposed to sweat, stretching and friction, so test one finished garment in the smallest relevant size before bulk production.
Printed vs heat-transfer vs woven neck labels
| Label option | Useful when | Check before approval | Common cost drivers |
|---|---|---|---|
| Direct inside-neck print | You want branding applied directly to a compatible garment | Contrast, opacity, feel, print area, collar seams and fabric stretch | Artwork setup, colours, print method and quantity |
| Heat-transfer label | You need fine detail in a thin applied label | Fabric and dye compatibility, edge adhesion, heat tolerance and smallest text | Transfer production, setup, application and quantity |
| Woven or satin sewn label | You want a separate physical trim with a distinctive tactile finish | Edge comfort, fold, seam placement, thread, label size and sewing quality | Weaving or printing setup, MOQ, sewing and label removal |
These are production tendencies, not performance guarantees. A correctly specified heat transfer may outlast a poorly sewn label, while an excellent woven label can still feel irritating if its edges or placement are wrong.
First decide whether the shirt can be relabelled
A neck label is not an independent sticker added to any garment. Start by confirming the exact blank manufacturer, product code, colour and size range. Ask the supplier to show how its original label is attached.
Common constructions include:
- a tear-away label designed to detach at a defined point;
- a label caught inside the collar seam;
- a separate label sewn onto the neck area;
- a printed product or care label; and
- multiple labels carrying different product information.
Do not assume “tear-away” means removal will be invisible. Inspect one shirt after removal for loose thread, an open seam, remaining material or marks. If the label is structural, removing it may require opening and resewing part of the collar.
For retail or merchandise, also confirm which original product information must remain and whether the blank supplier permits relabelling. If shirts will be sold in Malaysia or another market, check the applicable product-information requirements with the responsible compliance adviser before production. This is production guidance, not legal advice.
Relabelling an existing product does not turn it into a custom-made garment. Read ready-made blanks vs cut-and-sew if you also need control over the shirt pattern, fabric or construction.
When does a direct printed neck label work?
A direct inside-neck print removes the separate fabric label and can look integrated with the garment. It is useful when the available print method can produce clean contrast without creating an uncomfortable deposit.
Ask the printer to confirm:
- which print process will be used on the actual fabric;
- whether a base layer is needed on dark garments;
- the maximum safe area below the collar seam;
- whether the artwork stretches cleanly with the shirt;
- how small sizes affect the available print area; and
- whether the print can show through to the outside.
Fine grey text that looks elegant on screen may disappear on textured or dark fabric. A heavy opaque layer may remain readable but feel more noticeable. Approve physical legibility and hand feel together.
If this neck print is added to a shirt that also has front or back artwork, keep every location in the production brief. The inside-neck mark is another print position and can affect setup, handling and price. Use the complete T-shirt printing brief to prevent it from being missed.
When is a heat-transfer neck label suitable?
A heat-transfer label is produced separately and pressed onto the inside neck. It can carry crisp artwork in a compact area without adding a sewn edge, but successful application depends on the complete transfer system.
Before approving it, ask about:
- compatibility with the garment fibre, dye and surface finish;
- the required press temperature, pressure and dwell time;
- the risk of shine, scorch marks or dye migration;
- minimum line and gap sizes;
- cooling and peel instructions; and
- the agreed wash and abrasion check.
Do not judge adhesion immediately after pressing only. Inspect edges after the sample has cooled, been stretched and completed the agreed wash routine. Look for lifting, cracking, distortion, colour change and adhesive marks.
The printer should set the press for the tested garment rather than use one generic recipe for every shirt. Our guide to why DTF prints peel explains the same general lesson: film, adhesive, fabric and pressing conditions work as a system.
When should you choose a woven or satin sewn label?
A woven label forms artwork from threads. A satin-style label is normally printed or woven on a smooth label material. Both are separate components that must be positioned and sewn into or onto the garment.
They are useful when a visible physical trim supports the product experience, when several garment colours need one consistent label, or when a brand wants labels prepared as managed stock for repeated runs.
Specify more than width and height. Confirm:
- material and surface finish;
- straight cut, end fold, centre fold or another construction;
- finished dimensions after folds;
- edge softness and thread feel;
- exact sewing position and stitch colour;
- information on each visible face; and
- packing, leftover stock and ownership of unused labels.
A large label does not automatically look more premium. It can rub against the neck, buckle on a small collar or distort the seam. Test it on the smallest approved garment, not only on a large sample.
Keep label information accurate and readable
Start with the information customers need, then fit the label around it. Possible content includes a brand mark, size, product reference, verified fibre information and approved care guidance. Avoid shrinking everything into unreadable micro-text simply to fill a long wish list.
Two current standards are useful references for keeping underlying product data consistent:
- ISO 3758:2023 establishes a care-labelling code using symbols for washing, bleaching, drying, ironing and professional textile care; and
- ISO 2076:2021 defines generic names for categories of man-made fibres.
Referencing a standard does not by itself prove compliance in Malaysia or any destination market. Use the garment manufacturer’s verified specification and the requirements that actually apply to the product. Do not copy a care instruction or fibre percentage from another shirt because the fabric looks similar.
If the original label is removed, document which information was retained elsewhere, which replacement information was approved, and who supplied the supporting product data. Keep this record with the blank product code and purchase order.
Approve a neck-label sample with five checks
Use one sample made on the exact garment, not loose label material only.
- Position: confirm the label is centred, level and clear of the collar seam.
- Readability: check the smallest approved type or marks under normal indoor light.
- Comfort: wear the shirt and check edges, ink deposit, heat-transfer film and stitching.
- Appearance: inspect the outside of the shirt for show-through, puckering, shine or press marks.
- Wash response: follow the agreed care routine, then check adhesion, cracking, fading, fraying and seam movement.
Record the approved label dimensions and placement from physical reference points. “At the neck” is not a repeatable instruction. The logo placement guide shows how measurements reduce interpretation between sample and bulk production.
What should the quotation include?
Ask for a separated price rather than one vague “custom label” line. The quotation should state:
- label method and finished dimensions;
- artwork or setup charge;
- label production MOQ and quantity;
- application or sewing charge per garment;
- original-label removal or seam repair charge;
- sample cost and included revision rounds;
- price for unused label stock, storage or return;
- lead time after artwork and sample approval; and
- treatment of defects and replacements.
For reorders, ask whether labels will be produced again or drawn from stored stock. Save the final artwork, physical sample, colour reference, sewing construction and application settings. A file named “final label” without a version number is weak reorder control.
Compare the full delivered specification using the T-shirt quotation comparison guide, especially when one supplier includes label removal and application while another quotes only the label itself.
Send a quote-ready neck-label brief
Your enquiry should include the exact blank or garment sample, total quantity, colours and sizes, preferred label option, finished dimensions, artwork, required information, placement, deadline and delivery postcode. State whether original labels may be removed and what evidence supports any care, fibre, origin or certification claim.
Request quotations through Baju Printz once those details are ready. Ask each supplier to price the same approved construction so the comparison reflects the finish you will actually receive.
Frequently asked questions
Which neck label is best for a custom T-shirt?
There is no universal best. A printed or heat-transfer label can give a low-profile finish when the fabric and application are compatible, while a sewn woven or satin label creates a separate physical trim. Approve the result on the actual garment after wear and wash checks.
Can the original neck label be removed from a blank T-shirt?
Only when the garment construction, supplier permission and required product information allow it. Removing a label can open a collar seam or damage fabric, so inspect one sample and agree in writing what will be removed, retained or replaced before bulk work.
Are heat-transfer neck labels durable?
They can perform well when the transfer, fabric, heat, pressure and application time are compatible. Durability is not guaranteed by the method name alone; approve a production sample and test it through the agreed wash routine.
What information should go on a custom neck label?
Start with only verified and useful information, such as the brand, size and approved product or care details. Do not invent fibre composition, care instructions, origin or certification claims, and confirm applicable market requirements before removing original information.
Does relabelling a ready-made blank make it cut-and-sew?
No. A relabelled blank is still an existing finished garment with added branding. Cut-and-sew production develops or selects the garment pattern, cuts fabric panels and assembles the garment to an approved specification.
Ready to compare suitable printers?
Get 5 Free Quotes