
What Is Embroidery Digitising and Why Is There a Setup Fee?
Learn how artwork becomes a production-ready stitch file, what an embroidery digitising fee covers and what to approve before uniforms are stitched.
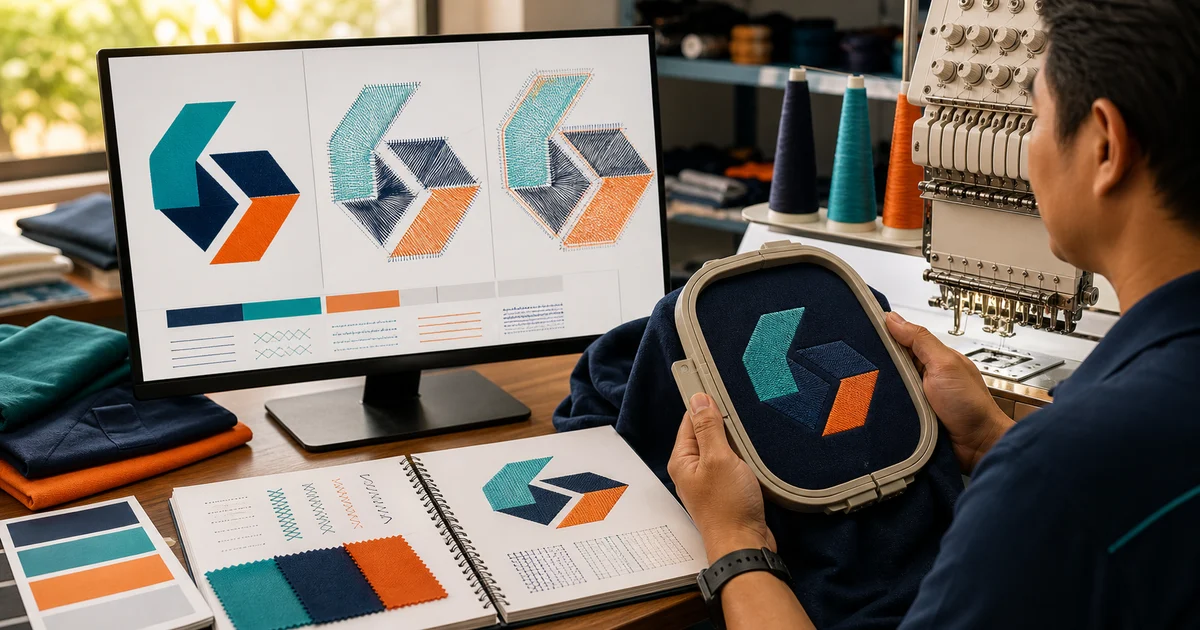
The short answer: embroidery digitising is the skilled conversion of logo artwork into production-ready stitch instructions for a defined size, fabric and placement. The setup fee pays for planning stitch types, direction, density, underlay, pull compensation, sequence and colour changes—not merely saving a vector file in another format.
Digitising is normally charged separately from the per-piece embroidery because the work happens before the machine stitches the first uniform. A quotation should state what the setup includes, whether a sew-out and revisions are included, and whether the approved file can be reused for reorders.
A logo file and a stitch file contain different information
A PDF, AI or SVG can describe clean shapes and colours. An embroidery machine needs a path that tells it how to form those shapes with thread and needle penetrations.
Wilcom’s embroidery documentation explains that a digitised object can carry properties such as stitch type, density, underlay and pull compensation. The digitiser also controls the order in which objects sew, because a poor sequence can create unnecessary jumps, trims, registration problems or fabric distortion.
That is why sending a vector logo helps but does not remove digitising. The artwork file guide explains what source file to provide; the digitiser then creates a separate embroidery master.
What happens during embroidery digitising?
| Stage | What the digitiser decides | Why it matters |
|---|---|---|
| 1. Inspect | Artwork quality, final width, garment, fabric and placement | The same logo needs different treatment at another size or on another material |
| 2. Simplify | Tiny text, gradients, narrow gaps and unnecessary outlines | Thread cannot reproduce every print detail cleanly |
| 3. Build objects | Running, satin, fill and other stitch constructions | Each shape needs a suitable visual and structural treatment |
| 4. Stabilise | Underlay, density, stitch length and pull compensation | Helps the design sit correctly on the selected fabric |
| 5. Sequence | Start points, overlap order, colour changes, jumps and trims | Affects registration, machine time and clean production |
| 6. Output | Machine format and production worksheet | Gives production the correct version, size and colour order |
| 7. Test | Digital preview and, where included, physical sew-out | Reveals problems that artwork alone cannot show |
Wilcom’s digitising overview describes embroidery objects as carrying colour, size, position, stitch type and density. A professional file is therefore a production plan, not a filter applied to an image.
Why does fabric affect the setup?
Thread pushes and pulls against fabric as the design is sewn. A textured pique polo, stretch knit, fleece, denim and stable woven shirt do not respond alike.
Wilcom’s fabric-specific property guidance shows that density, pull compensation, underlay and stitch length can change with the fabric profile. Its underlay guidance explains that underlay helps stabilise fabric and reduce puckering and pulling; simply adding more top-stitch density is not a substitute.
Tell the supplier the exact garment brand, code and material before digitising. A test on felt does not prove that the same file will sit cleanly on a lightweight microfiber polo.
Why does the final logo size matter?
Stitch files are not infinitely scalable. When a design becomes smaller, gaps close, stitches shorten and density can become excessive. When it becomes much larger, coverage and stitch construction may no longer be appropriate.
Wilcom’s scaling documentation notes that changes in size may require adjusted density and underlay. Approve the finished width before the supplier completes the file, and use the minimum embroidery detail guide to decide whether small text should be enlarged or removed.
If the company needs a 75 mm polo logo and a much larger jacket-back version, treat them as different production sizes. Ask whether the supplier will adapt the native design or charge for another digitised version.
Is automatic digitising enough?
Automatic conversion can be a useful starting tool, but it is not proof of production quality. Wilcom’s auto-digitising explanation states that default settings still need checking and that poor artwork may require manual adjustment.
A human digitiser should review:
- which detail must be simplified;
- the correct stitch direction for each shape;
- overlaps and sequence;
- fabric support and compensation;
- short stitches, tight corners and small gaps; and
- how the design actually sews on the intended garment.
A colourful screen simulation is not the same as a physical sew-out.
What should the setup fee include?
There is no universal package, so ask the supplier to itemise it. A digitising or setup charge may include:
- artwork inspection and reasonable cleanup;
- one defined logo size and placement;
- stitch-file creation for the stated garment;
- digital proof or production worksheet;
- physical sew-out, if expressly included;
- a stated number or scope of revisions; and
- storage or reuse for later orders, if agreed.
Keep the digitising fee separate from per-piece stitching, garment cost, special thread, individual names, extra positions and delivery. The Malaysian logo embroidery cost guide shows how to compare those quotation components without confusing setup with the complete job price.
Does the customer own the digitised file?
Do not assume ownership or file delivery. Commercial terms differ between suppliers. Ask in writing:
- Will you receive the production machine file?
- Will you also receive the editable native file or only a machine format?
- May the file be used with another embroidery supplier?
- How long will the supplier retain it?
- Is reuse free only for the same size, garment and placement?
- What happens if the logo changes?
Even when the supplier retains the working file, keep the approval record, finished dimensions, thread references, garment details and job number. Wilcom’s glossary distinguishes native design information from machine stitch data; receiving one output does not necessarily mean receiving all editable production objects.
When may redigitising be necessary?
The approved file may be reusable when the logo remains the same size and the new garment has a sufficiently similar fabric and placement. Ask for review when:
- the logo size changes materially;
- the design moves from flat polo to structured cap;
- the fabric changes from stable woven to stretch or textured knit;
- small text or colours are revised;
- the original file produces puckering or poor registration; or
- a different thread weight or production effect is required.
This is not automatically a reason for a full new fee. The supplier may only need an adjustment. Agree on the scope before production.
Approval checklist before bulk embroidery
Approve a sew-out on the intended garment or the closest agreed production material. Confirm:
- correct logo version and colours;
- finished width and placement;
- readable text and open gaps;
- clean edges and aligned outlines;
- no unacceptable puckering or distortion;
- suitable backing, topping and comfort;
- machine-file version and colour sequence; and
- revision, ownership and reorder terms.
The corporate polo embroidery guide covers garment and placement decisions around this technical step.
Send a digitising-ready brief
Provide the best available vector artwork, required finished width, exact garment code, fabric, colour, placement, quantity, deadline and a photo of any previous approved embroidery. Ask for the setup, sew-out, per-piece embroidery and delivery to be quoted separately.
You can send one embroidery brief to Malaysian suppliers or browse suppliers by state. Do not release the full uniform order until the digitised result has been approved at production size.
Frequently asked questions
What is embroidery digitising?
Embroidery digitising is the skilled process of rebuilding artwork as embroidery objects and machine instructions, including stitch types, directions, density, underlay, pull compensation, sequence and colour changes for a defined size and fabric.
Why do embroidery suppliers charge a setup fee?
The fee pays for production preparation that happens before per-piece stitching: inspecting and simplifying artwork, planning stitches, creating the machine file, producing a proof or sew-out when included, and revising the design within the quoted scope.
Is a vector logo already an embroidery file?
No. A vector describes shapes and colours, not how a needle should build them. The digitiser still decides stitch construction, sequence, density, underlay and compensation for the intended garment.
Can the same digitised file be reused for every garment?
Sometimes it can be reused at the same size on a sufficiently similar fabric and placement. A major size change, cap construction or different fabric profile may require adjustment or redigitising, so confirm reuse terms with the supplier.
Ready to compare suitable printers?
Get 5 Free Quotes